Pages

Friday, November 6, 2020

Gula Melaka Banana Cake

When I was younger, I love eating banana cakes. Used to buy the whole loaf from the night market as in those days we hardly do any baking at home. My mom is not too keen to bake then. Also, it was more convenient to just buy as bake goods were not too expensive in those days.

I must say that over the years, the humble banana cake has evolved quite a bit as people are adding more ingredients into it and came out with all sorts of modified banana cakes or even breads which are more western types that has a more compact or denser texture.  

Here is a version where Gula Melaka was added to further enhance the aroma of this all time favorite.


Ingredients

  • 180g butter
  • 60g castor sugar
  • 50g brown sugar
  • 280g all purpose flour
  • 1 tsp baking powder
  • 1 tsp soda bicarbonate powder
  • 4 eggs (beaten)
  • 300g bananas (mashed)
  • 90g gula Melaka
  • 3 tsp water


Methods

  1. Preheat oven to 160°C.
  2. Sift all purpose flour, baking powder and soda bicarbonate powder, set aside.
  3. Beat butter, brown sugar and castor sugar with a mixer till light and fluffy.
  4. Add in beaten eggs in 4 additions.
  5. In a small sauce pan heat up water and shaved gula Melaka to melt.
  6. Mix mashed bananas and melted gula Melaka and pour into mixture.
  7. Fold in flour in 3 additions.
  8. Pour batter into greased or lined loaf pan. Sprinkle some shaved Gula Melaka and brown sugar on the surface before sending into oven.
  9. Bake for 70 mins on the second lower rack of the oven. Check for doneness with a cake tester before removing from oven.

Sunday, October 25, 2020

Choy Keuk/Kiam Chai Boey/Left Over Soup with Mustard Cabbage

My dad came from a rather big family so every time when there's a celebration or festival, we get to eat lots of food as grandma will dish out dishes after dishes of yummy goodness. Sometimes she cooked so much, there tend to be lots of left over. Later on, when grandma retired from cooking duties for these events, we will dine in restaurants and will often have left over too. What do grandma do with these left over? She will dump all of these into a huge pot and boil it with kai-choy (mustard cabbage) and turned it into this soul warming goodness that we called Choy Keuk (Cantonese) or Kiam Chai Boey (Hokkien). You won't believe that a melting pot of mixed flavors can be so good!

Though I love this dish but I did not know how to cook this dish until I moved here! My hubby loved this dish so much that I decided to learn how to cook it! I tried to recollect my memories of how to prepare this dish after watching grandma and my sis-in-law cooking it. Grandma is a Cantonese and sis-in-law is Hokkien so I sort of merged the two together and finding the taste that best suited us. It is so easy and so appetising!

The only thing is, we hardly have much left over! Then I learned from some cooking groups that I can actually cook it from scratch without needing much left over dishes but rather buying left over roasted meat instead! Yes, the flavors from roasted meat (siew yuk or roasted pork, roasted duck and roasted pork bones) is the perfect ingredient. I will usually go to the Chinese restaurants to buy duck heads (you won't believe it but these are the flavor bomb!) and roasted pork bones. These are not very costly and they are the best to create the base for the soup. If you have left over pork maw soup, it is the best as the soup base to add extra flavors.

Why only use mustard cabbage for this dish? Apparently this is the only vegetable that can hold its shape even after long period of boiling. However, the Chinese's belief that these mustard cabbage is on the cooling side so try not to eat too much else it may cause joint pain. In other cases, eating too much of this soup might cause bloating. 


Ingredients

  • 5 pcs        Roasted duck heads (together with neck)
  • 500g        Roasted pork bones
  • 1 pc         Roasted pork knuckle
  • 3              Onions - quartered
  • 6 stalks    Lemongrass - smashed
  • 10            Dried chilies - deseeded
  • 10            Dried assam Gelugor slices - washed
  • 1 bulb      Garlic - slightly smashed
  • 2" knob   Ginger - slightly smashed
  • 2              Tomatoes - quartered
  • 2 sticks    Carrots - cut chunks
  • 2 heads    Mustard cabbage/Kai choy (separate the thick parts from the leafy parts)
  • 5L            Water/Soup stock
  • 2-3 tbsp   Cooking oil
  • Salt to taste
  • Whatever left over meat dishes you have (not fish)


Methods

  1. Heat oil in a deep soup pot (I used pressure cooker) and fry onions, lemongrass, ginger, garlic, dried chilies and assam slices till slightly brown and aromatic. 
  2. Pour in water or soup stock and boil till bubbling, add in the duck heads, roasted bones and pork knuckle. Boil for an hour or half and hour if using pressure cooker. This is to extract the flavors from the roasted meat.
  3. Fish out the beak part of the duck heads (if you don't want to eat broken up pieces of them!). Add in carrots and tomatoes and let it continue to boil for 15 mins.
  4. Put in the thicker parts of the mustard cabbage and let it boil for 15 minutes before putting the leafy parts in. 
  5. Season with salt before serving. Best to leave it over night for the mustard cabbage to soak in the flavors.


Friday, October 23, 2020

Pan Fried Pork Patties

I was making some stuffed squids for a project and was left with some of the pork stuffing used so decided to just pan fried them. Turned out they are pretty yummy cooked this way too! Kids loved it so asked if I could cook again? Can't say no since it is such an easy dish to do!


Ingredients

250g         Pork mince
½ tbsp      Minced ginger
½ tbsp      Minced garlic
2 stalks    Spring onions (white parts - chopped)
½             Red chilli (chopped coarsely)
2 tsp        Fish sauce
2 tsp        Light soy sauce
1 tsp        Corn flour
                A dash of pepper


Methods
  1. In a mixing bowl, mash up the pork mince with minced garlic, minced ginger, red chilli, fish sauce, light soy sauce and corn flour. Lastly, add in the white part of the chopped spring onions. Mix well.
  2. Roll the meat mixture into a huge ball and drop from a height back into the mixing bowl for at least 10 times. This step will help to bind the meat with all the ingredients.
  3. Divide into desired portions about 8 to 10 and roll into a ball.
  4. Heat up frying pan with some oil and flatten each ball before frying for 4 to 5 minutes on each side till cook.
  5. Garnish with chopped green parts of the spring onions.


Wednesday, October 21, 2020

Lemongrass Chicken Skewers with Special Dipping Sauce

I was working on a project to use chicken as the main protein which is easy to prepare and decided to use one of the recipes found in my book. As I seldom like to copy other bloggers' recipes, I will try to mix and match recipes from books, internet or from cooking shows that I've watch to come out with something. The initial protein used for this recipe was pork but using chicken is just as good.

The recipe from my book does not have any dipping sauce as it was meant for kids' bento. However, I felt that it will be good to add additional flavors to make the dish taste even better. My kids agreed that the dipping sauce did elevate the entire dish to a different level.


Ingredients

500g         Chicken thigh
2 stalks     Lemongrass
4 cloves    Garlic
2 tbsp       Fish sauce
½ tsp        Salt
1½ tbsp    Raw sugar
1 tsp         Cooking oil
1 tbsp       Dark soy sauce
a dash of black pepper
A couple of cilantro with roots (coriander)
Bamboo skewers/ satay sticks


Methods

  1. Cut chicken thigh into 1" cubes without skin.
  2. Pound lemongrass and garlic with a pestle and mortar into fine paste.
  3. Mix the chicken cubes with salt, sugar, fish sauce, dark soy sauce, cilantro (with roots), pepper, pounded paste and cooking oil. Marinate for at least 2 to 4 hours.
  4. String marinated chicken cubes with bamboo skewers.
  5. Heat grill pan with some oil and grill the chicken skewers till cooked.


Special Dipping Sauce

3 tbsp     Rice vinegar
3 tbsp     Lemon juice
1 tbsp     Fish sauce
3 cloves Garlic (minced)
1             Red chilli (chopped finely)
1             Bird eye chilli (optional for spicier taste)
½ tsp      Salt
1 stalk    Cilantro (chopped finely)


Methods

Mix all ingredients together.

Sunday, September 20, 2020

Kuih Bingka Ubi (Baked Cassava/Tapioca Cake)

I am not a huge fan of sweet food but I like cooking or baking them. When we first moved here, its not easy to find a lot of food that we used to eat back home. Over time it gets better but sometimes it can be costly and the taste may not suite our taste buds. Luckily with internet, I get to learn to cook a lot of food that we enjoyed from other people's sharing be it in Facebook or YouTube. 

Kuih bingka ubi is one of my hubby's favorite kuih. Previously it was hard find fresh ubi kayu/cassava, the main ingredient for bingka ubi here in Melbourne. Then a friend told me a couple of years ago that its ok to use frozen grated cassava. That means it so much more convenient! 

Over the past 2 years I have experimented with a few recipes but most uses desiccated coconut. Then stumbled onto this recipe shared by Shiokman Eddie. I like its texture as it is not as hard as those that have desiccated coconut in the mix. 


Ingredients


1kg       Grated cassava/tapioca or 2 packets of frozen cassava (500g each)
180g     Sugar
350g     Coconut milk
¼ tsp    Salt
2           Eggs
20g       Butter at room temperature


Methods

  1. In a bowl add sugar to the grated cassava/tapioca and mix them up till combined.
  2. Add in coconut milk, salt and the eggs.
  3. Mix all the ingredients thoroughly.
  4. Add in the soften butter at room temperature and mix well.
  5. Line a 10" square tin or a smaller tin (I used 7") if you want a taller kuih with baking paper, line the bottom with a piece of banana leaf and slowly pour in the mixture.
  6. Spread the mixture evenly with a spatula.
  7. Bake in a preheated oven at 160°C for 1 to 1½  to 2 hours.
  8. Do check after 1 hour into baking.Continue to bake till the surface is crispy golden brown and when skewer comes out clean.
  9. Remove kueh from baking tin and set aside to cool on a wire rack.
  10. Use a plastic knife or oiled knife to cut.


Saturday, September 19, 2020

Air Fried Roast Pork Belly on Dry Egg Noodles

Roast pork belly or siew yuk on egg noodles is one of my family's all time favorites! Usually we will savor this dish at one of our favorite Hong Kong restaurants but due to the 5km restrictions which was enforced since mid of August, we are unable to visit. Everyone has been missing their their siew yuk so no choice but to cook our own. 

This version is pretty easy and with the use of my air fryer, there's no dirty oven to clean. Pretty stoked with how it turned out too! The skin crackled beautifully making it really crispy. 


Ingredients

for Roast pork belly

  • 1 slab         Pork belly (about 1 to 1.2kg with a bit of fat under the skin)
  • 1"               Ginger  
  • 1 scallion   Spring onion
  • 1 tbsp        Chinese wine
  • 1 tsp          Salt
  • 1 tsp          Five spice powder
  • 1 tsp          White pepper
  • 1 tsp          White vinegar
  • Coarse salt for covering pork skin 


Methods

  1. Wash and clean pork belly by using a knife scrapping away dirt on the skin. Remove hair with a tweezers if there's any.
  2. Heat up half a pot of water (big enough to fit the entire piece of pork belly) and once boiling, add in the spring onion, ginger slices and 1tsp of Chinese wine. Slowly slide the pork belly in skin down into the pot making sure water covering the pork belly and let it boil for 20 mins.
  3. Remove pork belly and let it cool on a plate. Using a fork, poke the skin all over. Using a kitchen towel, wipe dry any excess liquid on the skin.
  4. In a small bowl, mix the five spice powder, salt and pepper. Make a few slits on the meat side and rub the spice mixes all over. Do not rub on the skin. Make sure you dry the skin with a paper towel. Brush the vinegar onto the skin. Keep in the fridge overnight.
  5. Lay out a piece of aluminium foil big enough for the the piece of pork belly with at least 5cm to 7cm to spare all around. Lay another piece of baking paper smaller than the aluminium foil inside but enough to cover the side of the pork belly. Fold up all the sides (to protect the meat from drying out) and leave the the skin expose. 
  6. Spread enough salt covering the entire skin before putting into air fryer for 20 mins at 200°C.
  7. Removed all the salt and air fry a further 15 mins at 200°C.
  8. Cool the the pork belly on a wire rack before chopping into desired size.


Dry Egg Noodles (per serve)

  • 100g        Egg noodles (loosen)
  • 1 tsp        Light soy sauce
  • 1 tsp        Dark soy sauce
  • 1 tsp        Pork lard
  • 1 tsp        Oyster sauce
  • ½ tsp       Sesame seed oil
  • ½ tsp       Garlic oil
  • 2 tbsp      Hot water or chicken broth
  • A dash of pepper


  1. Heat up a pot of water and prepare a bowl of cold water. Place all the sauces into a plate.
  2. Once water is boiling, toss the loosen noodles into pot. Stir so it is not sticking to the pot. Let noodle boil for 30 to 40 secs in medium heat.
  3. Take out noodles and toss into the bowl of cold water and stir it around to stop it from cooking further for 30 secs.
  4. Return the noodles into pot and cook it for 10 secs and toss into plate with all the sauces. Mix well to coat noodles.
  5. Arrange chopped up roasted pork belly onto noodles and garnish with some blanched green choy sum or bok choy.


Friday, September 11, 2020

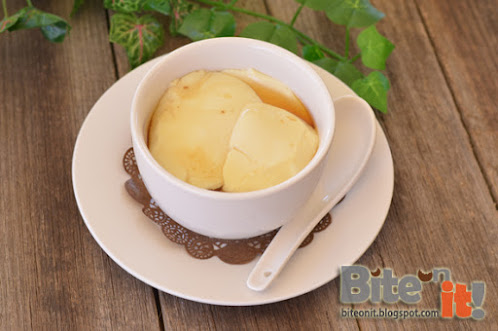
Tau Fu Fa using GDL

A couple of years ago some of us discovered about using GDL (Glucono delta-Lactone) to make tau fu fa or soy bean curd, a dessert loved by many. What make it so interesting is that we can actually use store bought unsweetened soy bean milk from the Asian grocers to make it. That was really exciting as the process of making your own soy milk is very tedious and time consuming. We were pleasantly surprised that the tau fu fa made with GDL turned out as smooth as those that used gypsum powder. For that, we can save so much by making our own instead of ordering from yum cha parlors 😄


Ingredients

  • 2L         Unsweetened soy bean milk (Yensons brand recommended)
  • 1tsp      GDL
  • 1tsp      Corn flour
  • 1tbsp    Water
Syrup
  • 4 slices  Ginger
  • 200ml    Water
  • Sugar or Brown sugar to taste


Methods

  1. Heat soy bean milk in a pot under medium fire till it reaches 95°C stirring all the time with a whisk to avoid the bottom from burning.
  2. In another stock pot or thermal pot, mix GDL and corn flour with water.
  3. Once the soy bean milk reaches 95°C, pour it over the GDL mix from a feet above the pot. This helps to mix the GDL with the soy bean milk well.
  4. Cover the pot and do not move it for at least 45 mins to an hour. 
  5. In a milk pot, boil water with ginger and sugar/ brown sugar to desired sweetness.
  6. Once the soy bean milk has been solidified, scoop with a flat spoon into bowl and drench with the ginger syrup. 


Thursday, September 10, 2020

Braised Pork (Tau Ew Bak)

One of the most popular dish in our household is this Penang Hokkien braised pork dish which is popularly know as Tau Ew Bak. Hubby and the kids just love this dish and they can eat every week if I will actually cook it! This is my go to dish when I'm out of ideas of what to cook. It's easy and the gravy is great for soaking up your rice.

I've done the gravy really wet and also thick and dry. Somehow it is still better with more gravy so I can add some hard boiled eggs to add on as additional fillers.


Ingredients

  • 1 kg          Pork belly (best with those that has a few layers of fats and with skin intact)
  • 10 cloves Garlic - slightly mashed
  • 1tsp          Peppercorns - crushed
  • 2               Star anise
  • 2tbsp        Black soy sauce (thick caramel)
  • ½ tbsp       Salt
  • 1tbsp        Light soy sauce to taste (optional)
  • 2 cups      Water (can add more)
  • 6 no.         Half boiled eggs
  • Oil for frying


Methods

  1. Cut pork belly into 1" cubes. 
  2. Heat up wok or cast iron pot with 2 to 3 tbsp oil. 
  3. Saute the garlic, star anise and peppercorns for about 2 minutes till fragrant.
  4. Toss in the pork cubes and stir till all sides are seared through. 
  5. Add in all black sauce and stir till all pork cubes are covered. Let cook for 2 minutes.
  6. Pour in water (enough to cover the pork), stir and cover for 15 minutes.
  7. Add in salt and light soy sauce, stir and cover. Simmer for 30 minutes stir every 10 minutes.
  8. Add in hard boiled eggs and simmer for further 10 minutes.


Lotus Roots with Peanuts Soup

Lotus roots with peanuts soup is one of my all time favorite! If the price of fresh lotus roots in Melbourne is not cut throat expensive, I would boil this soup every other day. Recently, it is priced at $16/kg so it is kind of steep but I was craving for it so bought a small section to satisfy my cravings.

I have previously posted this recipe before but have since have revised it for better tasting. The use of mix of boiler chicken and pork bones to get the base stock in which will give a superior taste to the soup.


Ingredients

  • 2L             Chicken and pork bones stock (boiled in pressure cooker for 45 mins)
  • 200g         Lotus roots (sliced about 5-7mm thick)
  • 10             Red dates (de-seeded)
  • ½ slice      Salted preserved vege (tai-tao-choy) 
  • 150g         Raw peanuts (pre-boiled in another sauce pan and skin removed)
  • 2 slices     Dried cuttlefish
  • 1 pc          Honey date


Methods

Heat up the soup stock in a medium stock pot and put in all the ingredients and boil for 1 hour.

This soup is naturally sweet so there's no need to add any salt or seasoning.  


Wednesday, September 9, 2020

Deep Fried Chicken Skin

 I hardly do deep frying in the kitchen as it often smoke up the entire house and it actually stink if I can't  ventilate it especially during cold weather. If it is not too cold and windy, I'll try to do it at the alfresco area with my portable stove. Only problem is, the portable stove is quite hard to adjust and when I needed smaller fire. Life is always in dilemma! 

From my adventure with the chicken essence earlier, I've collected some of the chicken skin and decided to use them to make these hard to resist crunchy snacks... Its so sinful but so good!


Ingredients

  • 200g     Chicken skin
  • 6 tbsp   Plain flour
  • 3 tbsp    Rice flour
  • 1 tsp      Salt
  • Oil for deep frying
  • Water


Methods

  1. Clean and dry the chicken skin with paper towel. Cut to desired size.
  2. In a flat plate mix flours and salt and mix to combined. Prepare a bowl of water and heat up oil in a small pan or pot, covering at least half the pan or pot.
  3. Bring a piece of the skin and press into flour mix, shake away the excess.
  4. In a quick motion, dip the floured skin into water and toss it back into the flour mix and cover with flour, press gently to make sure skin is coated with flour. 
  5. Test oil with a chopstick and if you see bubbles rising mean the oil is hot enough and is ready.
  6. Toss in the coated skin and fry till golden for about 2 or 3 minutes turning after a min. When it starting to brown, lift it up for a few second and toss it back into the oil and fry a another min. Lift up and drain on a strainer.
  7. Serve warm.


Thursday, September 3, 2020

Double Boiled Chicken Essence

This prolonged covid-19 lockdown here in Melbourne is wearing many of us down. Besides the ever challenging remote learning for all the kids, parents are feeling so burnt out. Normally I get a few hours of sanity when the all the kids are in school but now with them home 24/7 there's no break at all. I need to prepare at least 2 meals a day and I am almost running out of ideas of what to cook! All these stress are building up and I felt so tired just thinking of what to cook the next day!

Things might not change for another few weeks so I totally need to nourish my body... and mind. They said chicken soup is good for the soul! Finally made this double boiled chicken essence to repair my body. It's not as complicated as it sounds but the result is very rewarding. It is so fragrant and so full of chicken flavors. 


What utensils you'll need to prepare this classic tonic: 

  • 1 small rice bowl
  • 1 big soup bowl
  • 1 plate big enough to cover the soup bowl
  • 1 claypot or stock pot to put in the soup bowl
  • 1 pestle


Ingredients

  • 1 Free range or farm run chicken between 1.2kg to 1.4kg


Methods

  1. Wash and clean up the chicken.
  2. Chop chicken into about 12 to 14 parts. Remove as much skin and fats as possible.
  3. Using the pestle, pound the chicken pieces to break up the flesh and bones.
  4. Invert the small rice bowl and place it inside the soup bowl.
  5. Arranged the pounded chicken pieces around the small rice bowl. Once done, cover with the plate.
  6. Place the big soup bowl with the chicken into the claypot or stockpot. Fill water till at least half of the big soup bowl and cover.
  7. Boil the water on high heat till boiling and switch to small/medium fire to boil for at least 3 hours.
  8. After 3 hours, switch off fire and remove the big bowl carefully.
  9. Remove the plate and using a thong, pick up all the chicken pieces.
  10. Carefully pick up the small rice bowl and the chicken essence with flow out.
  11. Strain into a bowl and serves hot. This will yield approximately 1 rice bowl of essence.


Thursday, August 27, 2020

Air Fried Chicken 65 - Dried version

I've not heard of Chicken 65 until I moved to Melbourne. Probably I did not dine enough in Indian restaurants when I was in Malaysia hence a little behind on their offerings. I fell in love with it on my first try at this little Malaysian Indian restaurant named Indian Delight and has been ordering it each time i dine there. I went to try others too but some are just way too spicy!


The other day I bought 1.2 kg of chicken wings and was wondering what can I cook with them? So, I went through all the saved recipes from FB and found a sharing by this lady in Malaysia and decided to try as she made it look so easy. Just add everything and marinate overnight! However, she deep fried her chicken and that was the last thing I want to do. And my good friend, Black Knight the air fryer came to my rescue! No used oil to discard and minimal mess in the kitchen... I tweaked the recipe a bit to suit our taste buds (need to be kids friendly so its less spicy) and to suit air frying method.


Ingredients


  • 1.2kg          Chicken wings
  • 2 tbsp         Garlic & ginger paste
  • 1.5 tbsp      Coriander powder
  • 1 tsp           Turmeric powder
  • 2 tbsp         Chili powder (put more if you want more spicy
  • ¾ tsp          Salt
  • ¼ tsp          White pepper
  • 4 tbsp         Greek yogurt/plain yogurt
  • 2 sprigs      Curry leaf (chopped)
  • 6 tbsp         Corn flour
  • 3 tbsp         Rice flour


Methods

  1. Clean the chicken wings and pat dry with kitchen towels. Cut into 2 sections.
  2. Mix ginger garlic paste, coriander powder, turmeric powder, chili powder, salt and white pepper in a bowl. Pour the mixture into chicken together with yogurt and mix till well combined. Cover and leave it to marinate for 4 hours or over night for best results.
  3. Prepare corn flour and rice flour on a dinner plate and mix them well. Sprinkle the chopped curry leaf over and mix the chicken before coating the chicken with the flour and place into the basket of the air fryer. If you are deep frying, you halved the flour and mix into the chicken.
  4. Before you air fry, brush or spray some oil over the coated chicken wings.
  5. Air fry at 180C for 15 to 18 minutes and turn mid way. Remember to brush with oil after you flipped over as the flour will not cook properly without oil. Please adjust your air frying timing as sizes of the chicken may required more or less frying time.
  6. Drain on wire rack (if you put on kitchen towel to absorb the excess oil it will turn the crispiness of the skin soggy).
  7. Squeeze some lime juice over the chicken prior to serving.


Saturday, August 22, 2020

Braised Lemonade Pork Belly

As most of us are locked down at home, there's only so much we can do. Eat, sleep and repeat. It is bad for our health really! To de-stress, I will normally cook or bake else I'll turn into couch potato! Luckily I'm not into any TVB or K-drama...

One night, a friend was following this live cooking show on FB and asked me to check it out. It was Maria Cordero, a popular HK celebrity cooking live from her kitchen. The dish she cooked that night was this rather easy to follow pork belly dish using 7-Up. Pretty interesting and best part is, it is so easy as she literally just dump everything in and boil! No mess and no oily kitchen!

Kids love it knowing they get some soft drinks in their food! Yes, it uses 7-Up or any lemonade to tenderize the meat. It has a sweet savoury taste and kind of appetizing. As I do not have the required fresh chili, I substitute with some dried chilies which worked out better as I get a little kick of spiciness in the gravy. Kids practically flooded their rice with the gravy!


Ingredients

1 kg         Pork belly (cut into big cubes about 1.5")
4 pcs       Shallot (cut into big slices)
2 pcs       Garlic (cut into big slices)
1 - 2         Bay leaf
1 pc         Cinnamon stick
2 pcs        Star anise
1 pc          Fresh chilie (use 2 dried chilies if you prefer a tinge of spiciness)
350 ml      Lemonade (7-Up/Sprite)
2 tbsp       Dark soy sauce (dark caramel)
2 tbsp       Light soy sauce
1 pc          Rock sugar (can omit if you prefer less sweet)
1 tbsp       Vinegar (or rice vinegar)
1 tsp         Salt
½tsp         Black pepper


Methods

  1. Place all the dry ingredients into a deep pot (best if you have a cast iron casserole pot).
  2. Rinse the pork with some water added with 2tbsp of vinegar to get rid of smell.
  3. Drain and arrange pork cubes on top of dry ingredients.
  4. Pour in the lemonade. Add a bit more if you prefer to have more gravy.
  5. Put in the sauces, rock sugar, vinegar and seasoning. 
  6. Switch on medium fire and let it come to a boil. Stir every few minutes.
  7. Cover and let it simmer for 45 minutes on small fire till pork pieces are tender.


Monday, August 17, 2020

Orange Burnt Basque Cheesecake

I've cut down on cheesecakes ever since I was diagnosed with lactose intolerance over 20 years ago. I used to love American cheesecakes and Japanese cheesecakes but have to stop consuming when these cheeses got me a troubled tummy during my uni days. It got better over time but I'll still eat with caution.

Last year, the Basque Burnt Cheesecake was all the range as it went viral in many FB baking and cooking groups. It was definitely one of the easiest cheesecake or cake to bake! Just add all the ingredients and in to the oven and after 40 mins you'll have a lovely cake. I've been baking this cheesecake for so many times I've lost count! My kids simply love it and since its so easy... why not?

I've tried infusing it with lemon once and it turned out lovely. Probably the acidity of the lemon juice helps to eliminate or reduced the greasiness of the cheese and you don't feel bloated after eating. I have some really sour oranges which no one wants to eat so I decided to try using them to bake this burnt cheesecake and surprisingly the aroma from the oranges was fantastic. Kids really enjoyed it and the cake was gone in a flash.


Ingredients

250gm  Cream Cheese
75gm    Castor Sugar
3           Eggs
250ml   Whipping Cream
3tbsp    Freshly squeezed orange juice
20gm    Plain Flour
1tsp      Orange zest

Whipped Cream
100ml    Whipping cream
25gm     Castor sugar


Methods
  1. Line a 6" round baking pan with non stick baking paper.
  2. Pre-heat oven to 200C. You may want to check your oven as some may need to set to 220C.
  3. Cut the cream cheese into big cubes and beat with a mixer for 1 minute to break them up. Add in the sugar and beat till pale and creamy for a few minutes
  4. Add in eggs one at a time.
  5. Sift in flour and beat slightly in the mixer.
  6. Using a sieve, filter the batter into the prepared pan. Press down the trapped flour in the sieve.
  7. Mix in the orange zest.
  8. Bake in preheated oven for 30 minutes using fan-forced function.
  9. Bake a further 10 minutes using top/top and bottom heat to get the burnt effect.
  10. Cool on wire rack for 10-15 minutes and remove from pan and continue to cool on wire rack.
  11. Chill in the fridge for a few hours before decorate with whipped cream.
  12. To make the whipped cream, pour the whipping cream in a mixing bowl and whip for 1 minute and slowly pour in castor sugar and whip till stiff peak.Spread onto chilled cake and decorate with preferred fruits or macaroons.


Friday, June 19, 2020

Famous Amos Wannabe Chocolate Chips Walnut Cookies

The search is on to find the Famous Amos chocolate chips cookies recipe after I was given a gift box from Famous Amos by a visiting relative. I used to buy them when I was working in Singapore... a little treat after a busy week at work. These little morsels don't come cheap now. The last I checked on my last trip back to Malaysia, it was about RM7+ for 100gm for their regular chocolate chips cookies. 

During the lockdown, someone shared about a Malaysian housewife managed to decode the secret recipe that tasted closest to the real thing but after looking at the recipe which includes cooking oil I decided not to follow. A member in a food group posted this recipe which uses coffee emulsion/emulco/oil to elevate the aroma of the cookies caught my attention. Was thrilled I found a bottle of coffee emulco in my pantry which I have brought back from my last trip to Malaysia.

Without further hesitation I made a batch to taste. Followed the recipe to a T but somehow the texture of the cookies don't feel right. They lack the crunch factors. In fact they tasted rather doughy and hard. 

Comparing both recipes to see where are the missing links and found that this recipe does not include cornflour. So, made another batch by using this recipe as a base and tweaked the self rising flour and corn flour ratios. After 3 tries I finally achieved the texture I was after and believe me, once you started you really can't stop!


Ingredients

290gm   Self Raising Flour
70gm     Cornflour
250g      Butter - softened at room temperature
90gm     Dark Brown Sugar
90gm     Raw Sugar/Caster Sugar
½ tsp     Salt
½ tsp     Coffee Emulco/oil /emulsion
1            Large Egg
1 tsp      Vanilla Extract
25gm    Oats - toasted and grind to powder
25gm    Ground Almond Powder
250gm  Dark Chocolate Chips
100gm  Toasted Walnuts - crushed to smaller bits


Methods
  1. Beat the egg with coffee emulco and vanilla extract in a small bowl, cover with cling wrap and let it infuse for at least 2 hours or overnight in fridge. Bring to room temperature before to use (you can skip this step as I find it did not make any huge differences).
  2. Using a mixer, beat the softened butter, salt and sugar for about 5 minutes until well combined.
  3. Add in the egg mixture, ground oats and ground almond. Mix well.
  4. Sift in the flour and fold into the mixture using a spatula.
  5. Mix in chocolate chips and toasted walnuts and mix till you get a workable dough.
  6. Pre-heat oven to 160°C.
  7. Pinch about 10gm of dough and place on lined cookie tray with about 1” gap from the next cookie dough.
  8. Bake for approximately 20 minutes or till cookies turn slightly brownish.

Friday, May 22, 2020

Pickled Green Chillies

Pickled green chillies is a popular condiment for some of the fried noodles that I often whipped up for the family. Usually I'll just grab a jar from the Asian grocers but I found them to taste a little weird of late and I stopped buying completely. 


Saw some friends making their own so I decided to make some myself since my chilli plant are blossoming well this year. Most of the time I'll harvest when they turned red. Since I can use those green ones to make pickled chillies, I decided to harvest them.


Ingredients
  • 200gm Green chillies
  • 1 cup Rice Vinegar/vinegar
  • 2 tbsp Sugar
  • ½ tsp Salt


Methods

1. Cut chillies about 3mm to 4mm thick.

2. Blanch in hot water for about 20 seconds and drain. Place them on a kitchen towel and let them cool down and 
let them air dry.

3. Fill the cooled chillies into a sterilized jar and top with vinegar, sugar and salt. Make sure the vinegar  covered 
all the chilies.

4. Keep overnight in the refrigerator and you can enjoy them the next day.


Friday, May 1, 2020

No Oil Strawberry Swiss Roll

We love Swiss rolls as they are lighter compared to the regular butter or cheese cakes I often bake. Found this easy to follow no oil roll cake with fruits by Ochikeron which is quite refreshing. It only uses 2 eggs so it is not too much and great for afternoon tea.
.


.

Ingredients


For Sponge Cake
  • 2 egg
  • 50gm Castor Sugar
  • 35gm Cake Flour
  • 20gm Milk (room temperature)


For Filling
  • 200ml Fresh Cream (heavy whipping cream)
  • 1 tbsp Castor Sugar
  • Strawberries


Methods


  1. Preheat the oven to 180C
  2. Line baking pan with baking paper.
  3. Beat eggs and sugar with wire whisk in a metal bowl. Placed it over the pan of hot water and melt the sugar and warm them up to 40C.
  4. Then with a handheld mixer, beat the batter on high speed for about 5 minutes until white and fluffy.
  5. Switch to low speed, beat for about 2 minutes to set the texture.
  6. Sift in flour and fold together with spatula till mixed well.
  7. Add milk and fold together with spatula until combined.
  8. Spread the batter into baking pan and drop the pan lightly on the counter to raise the air bubbles out of the batter.
  9. Bake at 180C for 11-12 minutes till top turns light brown.
  10. When it's done, drop the pan lightly on the counter to prevent shrinking. Remove the cake from the pan by lifting the baking paper and place it on a wire rack to cool.
  11. Once cooled, remove the baking paper and place the sponge cake on the baking paper with the brown side up.
  12. For the filling, combine fresh cream and castor sugar in a dry, clean bowl. Float the bottom of the bowl in ice water, whisk the cream until it forms a soft peak.
  13. Cut strawberries to preferred size.
  14. Coat the surface of the sponge cake evenly with the cream. Place the strawberries over the creamed surface and leave and inch on both ends.
  15. Roll the sponge cake and wrap with baking paper by twisting both ends to set. Put it in the fridge for 30 minutes to an hour to set.
  16. To cut the cake, dip knife in hot water, wipe, and cut. Repeat this each time you cut to get a clean cut.